Friday, August 1, 2014

Grecian Princess Solstice dress
I meant to make this dress for Fern to wear on Easter. With all the commotion of the coats, it didn't get done. That was ok. I tend to get very ambitious when I am in the fabric store. It is nice to have projects lined up though, even they don't quite get finished by whatever deadline I had in mind. This did get finished soon afterwards. 


It is a sheer georgette type of material in a pink and white print, lined with a cream colored satiny fabric; probably the anti-static JoAnn's lining. It is a simple rectangle with elastic encased in the top. The sleeves are a ~2" wide strips that contain wide elastic and have little cap sleeves added to the sides. I meant for the dress to be a little wider than it is, but it is wide enough for her to walk and run in, so it works. I also intended to do a shirred waistline, but once I got this far she declared it done, put it on and wouldn't take it off. 
So I let it be. 
It seems like it would make a wonderful night gown, but Fern doesn't agree. 
She likes to wear it to watch ball games:


....to go for a walk down a sunny road deep in bear country:

....to dance on stage at a Mr. G concert:
 (This time wearing the dress inside out for a new look she was excited about)
Have you seen Mr. G? Do you have kids? If you said no the first time and yes the second, you should really keep your eye out for a Mr. G show - he is lots of fun!

And finally, she wore this dress when we went "camping" (we did sleep in tents but there was a cabin with a refrigerator nearby) on the summer solstice with some dear friends. I realized at the time that this was actually the purpose this dress was made for. I made all the kids crowns of dried herbs to wear in their hair as we celebrated the longest day of the year by sleeping outside, playing with glowsticks and eating s'mores under a starry sky. 
And she looked like a little grecian princess. 
And she loved it. 
(and so did I, I am tickled to have daughters!)


 Enjoy the rest of the glorious summer we are being blessed with!


Wednesday, July 30, 2014

Leotards in Red, Dancing for Me
     The girls have both been taking gymnastics at the Y. Fern just finished her second year of classes and Althea just finished her first. They seem to really enjoy it and I love watching them. Little kids in leotards playing follow the leader and jumping on the trampoline is up there as one of the cutest things ever for me. At the end of the year they had a recital for all of the gymnastics and dance students. It was basically an hour long class (which is usually half an hour long) with family invited to watch. The kids in their group were supposed to wear red. It didn't have to be a leotard, just something comfortable that they can move around in. But how could I resist making them some red leotards? Especially when Fern can't get enough of anything red lately. It is such a nice change from the pink that has dominated their wardrobes for so long.
     I made the same size for both of them. I modeled it after a leotard that they already have, combined with a pair of boy short style undies of Fern's. I hate high leg openings that show off diapers / undies when they wear them without stretch pants. The fabric is a shiny, stretchy lycra for dance costuming which I got at JoAnn's; it was a bit pricy but of course I had a coupon and I really didn't need very much at all. Certainly less than a yard total for both, although I bought one and a half yards to be safe; oh the possibilities for the leftovers of this fun fabric!
     The neck and sleeve hems are finished by folding them over twice to conceal the edge of the fabric and stitching in place with a double needle to look neat and preserve the stretch factor. I didn't end up finishing the leg holes; the fabric doesn't unravel so it is ok that way. I didn't want to lose any of the length there; I was considering going over them with bias tape but they fit so well right now, I don't want to mess that up!
     Here is Althea on her horse practicing to join the circus:

And here are both sisters (Fern of course has added a skirt to complete the outfit)

Fern on the beam during the recital - she is such a ham! She spent the whole show making sure someone was watching her. I do love how the low leg holes keep everything covered here. 


And here is one of my favorite pictures! Both girls together on the podium that they climbed up to receive their ribbons, with their awesome teacher in the background looking just as excited and happy for them as we did. 

Monday, June 16, 2014

Now for details on Althea's Popsicle Safari Coat. (and some dog-walking fun)
For starters, it is huge, but that is ok. Better large then small right? I rounded up on her measurements and also I did NOT forget the seam allowance on this one and it turned out that this coat is actually bigger than the one I made for Fern. But I had each girl so specifically in my head when I made each jacket that I couldn't bear to just swap them at the end. This one remains Althea's popsicle safari coat and the fancy trench is Fern's. End of story. Unless they decide to swap and borrow from each other. Which they do already. Althea is tall and sturdy and their wardrobes are virtually interchangeable right now (ages 2.5 and 4.5). 
The fabric is of course from the home dec fabric at JoAnn's again - I just can't get over the prints!! Look at this popsicle print! It can't get much cuter than this. I love the bright colors too. The lining is the anti-static poly liner from JoAnn's, same as Fern's, just a different color.
This coat follows the Melange pattern from Ottobre 6/2013 exactly in terms of shape of the garment. They use a stretchy wool knit, but I think the pattern worked great for a woven fabric. I did add an elastic waistband encased between the outer and inner fabric layers stretching across the back. 

I also used a different layout for all the pockets I wanted to include. There are four patch pockets on the front: an upper and lower pocket on each side with the upper pockets having flaps to close them. I did not have very large pieces of material left over from which to choose my pocket pieces, but look at the amazing luck I had with lining up the fabric pattern:
 It meant that I placed the lower pockets farther out to the side and the upper pockets closer to the center, but it is symmetrical and to get those lower pockets that spot on, I was thrilled. I like how the upper pockets didn't match exactly, but they make their own kind of sense anyways. And if you look for a second you can find the blue surf board created on each side. 
There are also flannel heart side-seam hand-warming pockets (as with Fern's), bringing the grand total up to six pockets. Althea is pocket crazy and she has filled every single one with treasures on a walk. 


I used a fun bright orange sport zipper to close it, along with a cute cupcake button that Althea chose. 


I learned a lesson in zippers here. First of all, I didn't even realize that there were two types of zippers out there, ie. closed bottom zippers vs. separating. Then, I finally got my hands on the right one and needed to adjust the size. Well, I do know that on a close-bottomed zipper I can adjust the size by creating a new stop at the bottom by sewing a few zig zag stitches with the stitch length set to zero. But I obviously couldn't do that on a separating zipper. So I needed to cut some length off the top. And the zipper had a distinct stopper at the top, but I figured that I had to cut that part off, and hey, when the zipper gets to the top it will stop, right? I talked about this briefly with the lady at JoAnn's and she agreed with me, but apparently she isn't a seamstress. The zipper does NOT stop at the top. It continues on until the zipper is in your hand, not on your coat. At which point you can manually unzip the coat and thread the zipper back on and down to the bottom and start over, trying not to pull the zipper up all the way this time (and try to convince your two year old not to pull the zipper off, or at least to give it to you not throw it on the ground and continue on if she does). I ended up trying to sew the stopper part of the zipper onto the top of my zipper, but since they are not completely attached still, the zipper sometimes goes around it. I am going to try to glue the stopper to the end of the zipper and see if that makes the difference. 
The proper way to adjust the size of a separating zipper is described here. I haven't tried this myself yet, but it makes a lot of sense and may save me some grief in the future.
Aside from my zipper woes though, I love this little coat. This pattern is great. I think my favorite part about it is the hood. I want to make every hood I do in this style now. The bottom of the hood wraps around to the front of the coat and closes securely with a button. This really keeps this hood in place. Again, I did not add any elastic or drawstring / pull cord to this hood and it doesn't need it at all. It just stays put. Love it. (I promise to come back with a good picture of the hood and the button)
And I love my little dog walker in it as well. 
Can you tell our secret to successful toddler dog walking?


I am holding the double leash attached to both dogs. She is holding a longer single leash attached to one dog so that she can feel like she is walking a dog just like mom. But they are never able to pull her because I keep my leash tighter than she does. Both girls love this. They feel like important helpers and I like how it is almost like having a leash on the child as well because it keeps them close. Fern will usually hold my hand with her free hand at the same time. It is sweet. For the first ten minutes. Then it turns into some sort of feat of balance and patience as I try to manage both dogs and a girl on piggyback, or two dogs and a straying toddler that lost interest. Poor old dogs get a little jipped in the walk department lately. I think I am going to have to slip in a selfie I took while trying to take both kids and both dogs on a walk to the park a month or so ago. At least I brought a Boba baby back pack. No stroller though. We were out walking. I figured at least one of them would want to walk anyway. But alas......
.....we walked home close to a mile like this. With me holding the double leash attached to two sixty plus pound dogs. My plan was to just drop the leash if they decided to lunge towards a squirrel or something but fortunately they didn't make me put my plan into action. The furry boys are getting older and a shorter walk tires them out like it never did before. And those girls are getting heavier.


Friday, June 13, 2014

Easter came and went a while back.....
I think Easter may be my favorite holiday to sew for. Last year I made dresses and bonnets. 
This year I did fun fancy coats! I am so excited about them. They both came out really well and the popsicle coat Althea is wearing will definitely fit both girls for a long time to come. 
      This picture was taken on Easter (both girls wore last year's bonnets and Fern even insisted on wearing last year's Easter dress- this girl is not afraid of pattern mixing - I love her strong sense of very true-to-herself style). I was finishing them up last minute the night before (of course), and realized the zippers I was planning on using were not going to work (closed bottom, not separating zippers....ugh. I don't have much zipper experience and learned quite a bit on this project). So they don't have zippers in this picture.
      They do have silky linings. Flannel heart side-seam pockets. Flat felled seams throughout except for the upper reaches of the arm seams. And beautiful little girls to wear them.
     I was heavily inspired by both this coat (which completely took my breath away when I first saw it!) and a hand me down coat that we have that was lovely at one point, but is now stained. It was also a little bit small for Fern by the time we got it, and it does not seem to suit Althea's taste.
     I drew sketches of both coats as I envisioned them. Fern's is a twirly trench coat with a hood, an off center closure and a large belt / sash. Althea's is a safari coat with an elasticized rear waist and a hood - and a total of six pockets (because I ran out of time to add the secret interior pockets I wanted to add).
      After I decided what I wanted them to look like, I began looking through some Ottobre magazines online, searching out an issue that would have two patterns that would work for me. I had never used an Ottobre before, but had been reading so many good things about them I figured I had to try it out. Ottobre is a great Finnish fashion magazine aimed at sewists that includes patterns for everything in the mag: about 40 patterns per magazine! So it is a steal, even though shipping and the conversion from Euros to dollars means that it cost me about $20 as opposed to the $10.95 it lists at on the website. I went with the winter kids issue 6//2013. There is a pattern that I used almost exactly for Althea's (the "melange"), and also a little moto coat/sweater with an angled off-center zip (the hunstman) that I modeled Fern's from. I think the final thing that really motivated me to try an Ottobre was this tutorial from Sew Straight & Gather. Her idea to trace the patterns with a crayon and iron them onto paper is genius. I used plain white packing paper that my husband brings home from work for me when they get large deliveries. The sheets are huge and we use them for painting and I love to use them to make pattern pieces. Gotta love the price point on that!
I will dissect them in more detail one at a time. Let's start with Fern.
The outer fabric is from the home dec section at JoAnn's, just like Althea's overalls. It is covered in stylized lollipops. Perfect for a little girl and I just love the color scheme that it uses. The lining is JoAnn's anti-static polyester liner. I used the Ottobre pattern pieces for the bodice of the pattern. I shortened them quite a bit to hit at her true waist (so I could add the skirt there) instead of at the hips. I also straightened out the left front bodice piece - in their pattern it starts off center at the top and then angles down to the center by the bottom- so that it remains off center all the way down. I also used the hood and sleeves as is from the pattern, and drafted an a-line skirt to attach to the bodice to complete the trench look. 
Unfortunately, I neglected to add seam allowance when I cut the pattern pieces from my fabric. I had some choice things to say to myself when I realized that. The good thing is that I had read that these patterns tend to run slightly large and I was trying to err on the side of overestimating when I calculated their sizes. I do think it is a good thing that they don't include seam allowance - there are so many options of types of finishes; I tend use a larger seam allowance than recommended, especially if I am going for flat-felled seams or french or something. I hate having small bits to work with and would rather give myself a solid 3/4"-1" and have more to trim and a larger space between my rows of stitching than to struggle with it. I find I do much neater (and faster) work this way. With much less muttering and swearing. Anyway, if I am in charge of adding seam allowance myself, then I can add as much as I please - so long as I remember to add it. 
In the end, the sleeves and hood were fine the way I cut it. What I did add was a ~3" panel to the front left bodice and skirt piece to allow it to reach far enough across her body and to overlap the right panel enough to close comfortably. I had to make this panel with scraps (the panel attached to the skirt portion is actually two pieces itself), and please note how beautifully they lined up: 


There are on-seam side pockets made out of cozy heart flannel, and pretty interior seams.
And there are two wide sash pieces attached at the side seams to tie in a large bow in the front of the coat. I was inspired by the trim Falafal and the Bee used on this dress to try out a fancy stitch my new machine offers to top stitch the sash and I love it. 


Fern picked out the button that we used to close the top:

It is plastic but looks like an antique glass button. The colors are slightly off but she loved it so it was the winner. She likes to wear it closed with only the button and call it a cape. I think it makes her feel like she is in Frozen when she does that.
I still have yet to add the zipper to her coat. She likes her "cape" without a zipper, but I do plan to put one in eventually. When I do finally install the zip, I will be referencing this tutorial about shortening separating zippers. I ran into some trouble winging it on Althea's coat, but I will discuss that later on.
The only thing I regret about her coat is that I did not include a casing for a drawstring around her hood, or at least some elastic in there around the top. It does not stay up on her head very well, especially with her fluffy hair and that silky lining. 
She isn't fazed by this though, and has actually continued to wear it and chooses to wear it on her own which I love. It is a great weight for a spring / summer jacket. Here she is again:


Thanks for stopping by!

Wednesday, May 14, 2014

Yee Haw!

   Fern's class had a fun time celebrating the week of the young child back in April with a different theme for each day of the week. On Wild West Wednesday they were encouraged to dress as cowboys and girls if they wished, or to at least wear some jeans. I love how young kids love to dress up; I hope mine always do and never feel self conscious about having a good time. 
  She usually won't wear jeans, but she does have a pair with a few sequins stitched down the front that she found acceptable enough for the occasion. She also has a great button down white shirt with some pretty details (both shirt and jeans are hand me downs) and a fun red hat that my folks bought her sister as a gift to wear on her rocking horse:

   So she had the basics covered. But I couldn't help creating one piece to top off the outfit. My mom had these amazing buckskin hip hugging bell bottoms in the 70's that she had handed down to me in the 90's. I had recenetly found them and they weren't in the greatest shape. I regret not having a picture to share, these pants were truly amazing in their prime. They were beyond repair in their current state however, so I was looking for a fun leather project with which to repurpose them. This seemed like the perfect opportunity!
   I used a pattern from another project that has yet to be blogged and made a quick vest. Leather is thrilling to me, because it seems like a regular sewing machine shouldn't be able to handle it, but it is actually no problem at all. (Just remember your leather needle) I love it. It demonstrates how many things are possible with a basic sturdy machine, like this Baby Lock that I am in love with. So here it is:

The seam down the middle of the back is the original side leg seam of the pants. I used a flat felled seam at the shoulders, then realized that was complete overkill on many levels. The leather doesn't fray, so it is unnecessary to hide the edge of the fabric; it just made extra work for my machine sewing through three layers of leather instead of two. So the side seams of the vest are just over lapped and the sewn with two rows of straight stitching in what I will call a mock flat felled seam. 
No leather cowgirl garment would be complete without some fringe, either, so I added a couple rows of that across the chest on each side of the front. Fringe is so fun to make. Fabric with zero fray opens up so many possibilities, and sews up so quick! No hemming, no real finishing. Angled seams and rounded edges are a breeze. Did I mention how much I love sewing leather? One of the girls may need a full length fringe skirt at some point. That would be a warm item to wear on Halloween!
And here she is! 
Stick em up!
 I love this curly little ham. 

We've got another good sport in our house:

Cheers!


Friday, May 2, 2014

I have been sewing a lot more than I have been blogging lately. (You would hope so, right?) 
I have been battling a respiratory thing along with my kids for upwards of a month, which is horrifying to say. I try to boost our immune systems and eat healthy foods but we are really having a hard time shaking it. It seems like it is not just us though; the wacky weather of this spring is catching up with a lot of folks around us as well. My point here is however, that I have been spending a lot more time sleeping at night than I usually do. And when I find some time to work on something, it is either outside in the yard / garden; cleaning the house; or SEWING. Not spending time on the computer. I knew blogging was going to be a challenge for me because I don't enjoy screen time very much (with a key exception being Game of Thrones) and am usually trying to limit it more than expand it. But the online sewing community is so inspiring and motivating and educational that I can't help myself. 
I am going to try to post at least once a week for the rest of the year. 
There, I said it. So now that it is in writing perhaps it will come true. 

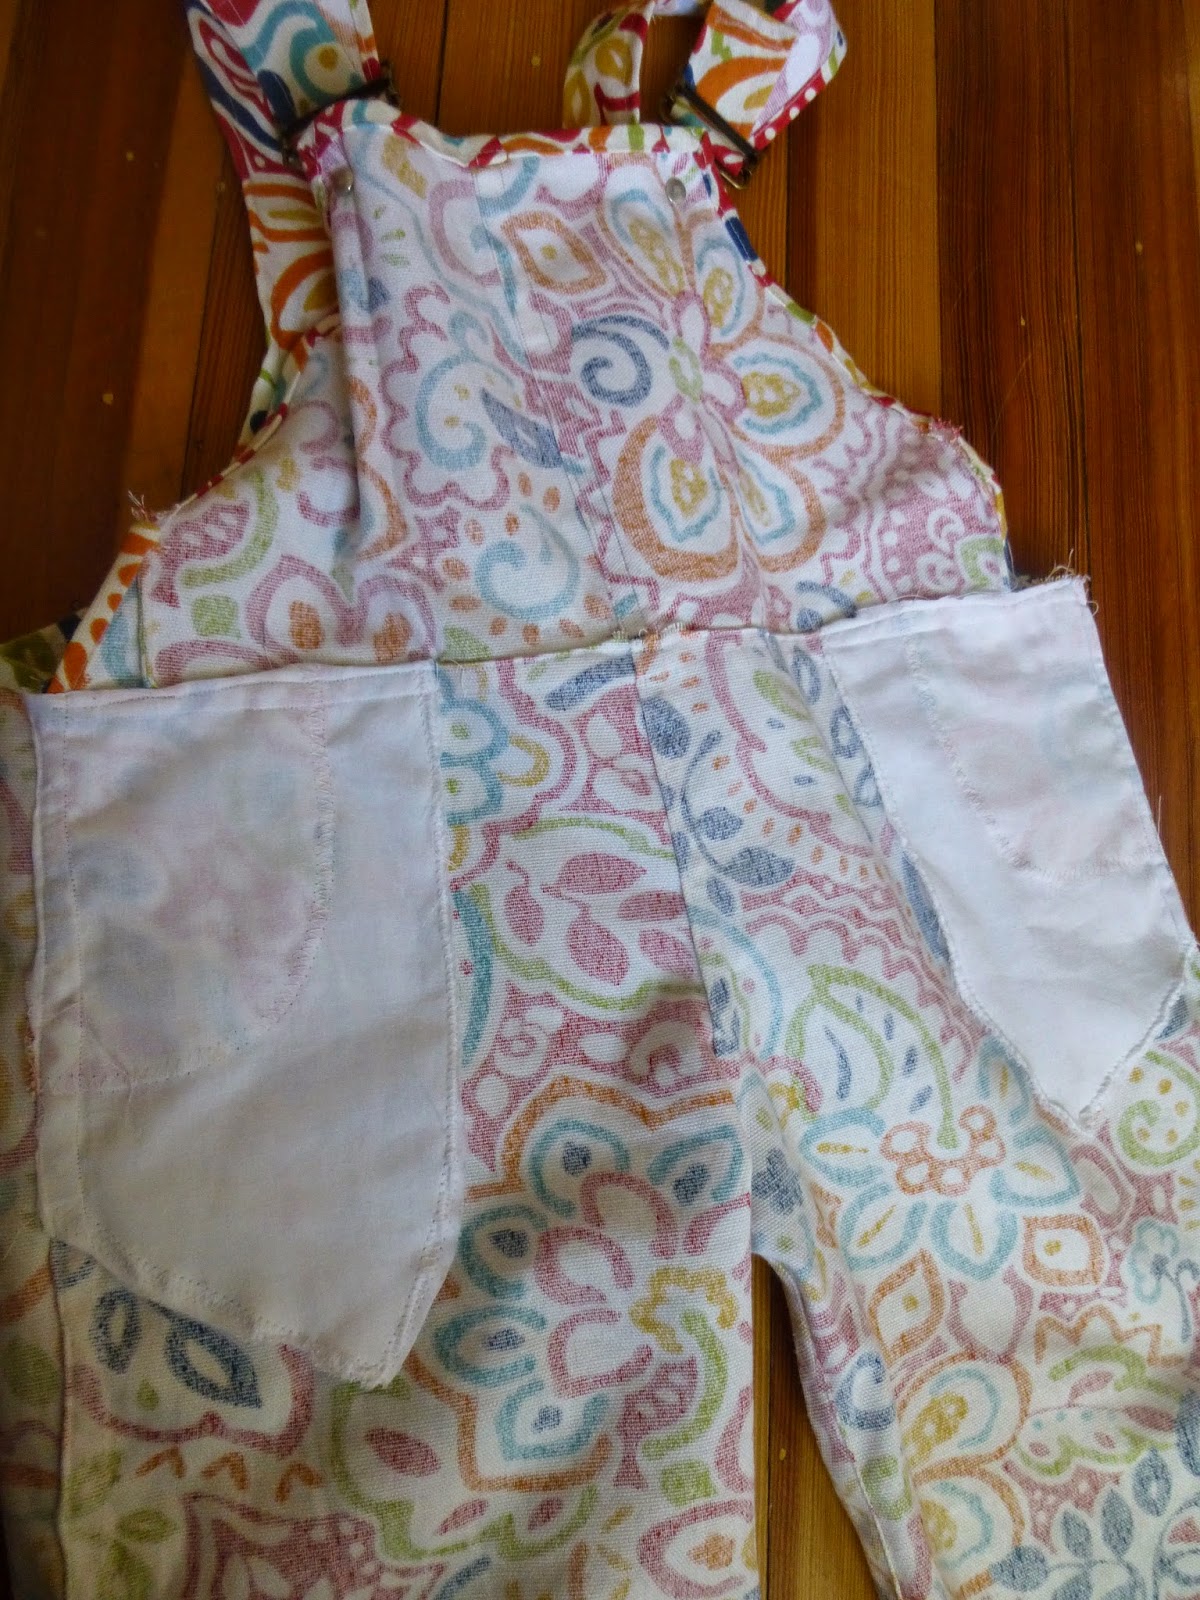
So here is a project I finished last month. And a major reason I love to sew. Look at that fabric! Isn't it fabulous? I made Althea some overalls to replace a pair that she has grown out of. 
I used an outdoor fabric from JoAnn's. I love that stuff! They have so many amazing prints. And the fabric is very sturdy without being too stiff or heavy. Perfect for this project (and another project I will share soon!) So when it was on sale a while back I couldn't resist. 
I drafted the overalls myself by looking at the pair she already had. I included front slash pockets:
and a pocket in the middle of the bib. 
I learned a few things along the way. 
#1: Installing those big buttons for the overall hardware is fun: you wack away at it with a hammer. Those buttons are pretty heavy duty however, and even though I used a sturdy fabric, I should have had more layers where the buttons are; next time I would either line the whole bib or use a wide hem or facing on the top so there are more layers of fabric at the buttons. 
#2: I need to keep reminding myself: Flat felled seams are wonderful but very difficult to install on the inside of a garment with narrow room to work like a sleeve or leg hole! That's what french seams are for. Or does anyone have other suggestions for a favorite inseam stitch?
#3: My original bib pattern pieces was way too small. See how low it is on her chest here?
 That led to the straps falling off of her shoulders constantly; plus it looks a little funny. So I removed the bib and added about a 4" strip of fabric to it. Which made it way too big (but I didn't want to be too small again!). So then I folded it down and basted it at the proper height; now if she starts to grow out of them, I can just rip that basted seam and adjust. Ta da!
#4: I got a little lucky with the width of the top of the bib; that is a measurement that I should have paid more attention to. If that is too wide or narrow, the straps won't stay put on their shoulders very well. I was considering adding a strip of elastic between the shoulder straps in the back, but once I added the extra length to the bottom of the bib, they began to stay put better. They are still a little wider than ideal on Althea (above, 2 yrs). The straps hit her 4 year old sister perfectly (below), although the inseam is a bit short on her!
She is a goof, but she is a much more willing model than little sister!
  So of course, now that I made them, Althea is growing into a phase of needing to wear a pink dress every day so that she can be Sleeping Beauty. She introduced herself as Sleeping Beauty to a friendly stranger the other day. Perhaps there will be a new pink dress in her future.


Wednesday, February 26, 2014

  This week marks the end of Project Sewn; they are already on their Signature Style week. There has been some really fun and inspiring stuff going on over there. I tend to sew more for the kiddos, but it is fun to try to sew for myself as well. It's definitely harder though. The wrong fit can kill it (or require a lot more work) when I sew for myself. The girls are pretty easy to fit, not to mention aren't very picky about things that don't fit perfectly (if it is pretty).
    I had some success the other night though that I was very happy with. I had some very soft knit material that I wanted to use to make a copy of an old favorite pair of pants that I love. They are wide legged "skirt pants" (as named by Fern) that have a wide foldover waistband. They are total lounging pants but I dress them up sometimes with a nice top and shoes and feel they serve my purpose well. Comfortable and flattering equals perfect in my book. And sewing more with knits has been something I've been working on. I was using exclusively woven cotton until recently. My new machine has some new stitches to try out which is exciting. I've also been learning more of what I don't know through reading other folks notes online.
    So I laid my pants out onto some paper and tried to trace them and make some pattern pieces without cutting them up. The old ones are a little pill-y but definitely still have some life left in them as house pants.  It worked great! I made a pattern piece for the leg and cut two; assembling them by first stitiching the crotch seams then closing the leg inseam. I didn't use a stretch stitch for either of these as the pants don't really need to stretch much vertically. I just used a straight stitch, then played with all of the fun types of decorative zig-zagging I now can do on the inseam seam allowance to finish that seam. And I did a flat-felled seam for the crotch seams. Note to self: remember that while flat felled seams certainly do make a very sturdy and finished looking seam to use for that part of your pants, you ARE actually top stitching right down the front of your new pants whilst you do so, so don't be to lazy to match your thread! Realized that about 20 seconds too late (yes I am definitely too lazy to take the seam ripper to a seam that is already 1/3 sewn, especially when doing so would very likely leave behind some carnage on the remaining fabric, front and center). I made the waist band by measuring a large rectangle about 2 inches shy of the diameter of the waist of the pants as they were sewn thus far (my pants were 31 so I cut my waist band 29). The other dimension of my rectangle was whatever I had for fabric, probably 10-11 inches. I then sewed the short edges of the rectangle together, decreasing my waistband length further to about 28 -28 1/2 inches. Then folded it in half lengthwise and attached to the pants, easing in the larger waist and stretching the waistband as I went. Here, I sewed with a stretch stitch which is a new feature to me. Worked great. The waist looks great, isn't too tight as I feared and keeps the pants nice and secure but comfortable. Final step was to hem the legs by folding twice and sewing a fancy wide zig zag.


Finished them last night; wore them all day today while driving to and from school and the Y and catching a yoga class. And there they are, already wrinkled and dirty. (They may have started off not completely unwrinkled - some double negatives for you to sort out and find my guilt). No less comfortable then they started out though, let me tell ya. They do justice to my favorite old pair; and they make me want to make several more pairs now that I know my lil pattern works. Alas, I blew my fabric budget for the time being at JoAnn's the other day during a sale they were having. 

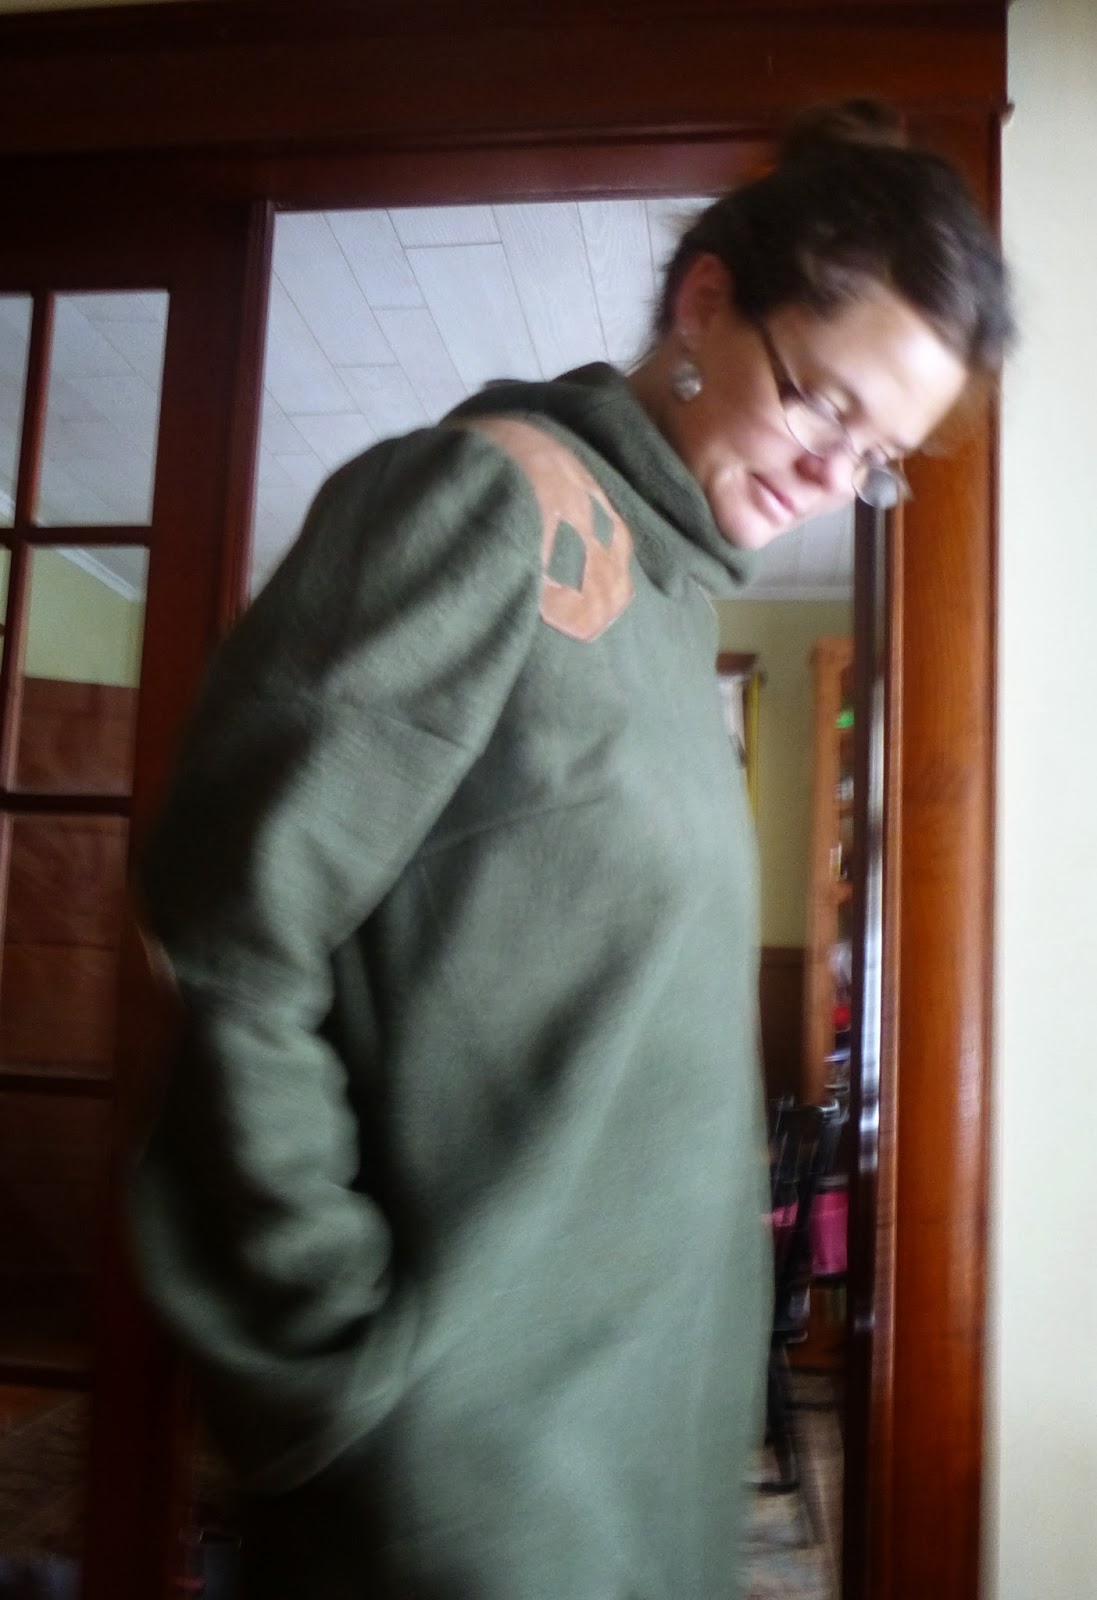
I wore these pants today with a fleece dress that I finished several weeks ago and intended to present along with a pair of boots that I love in the project sewn "if the shoe fits week". They had an entire challenge dedicated to sewing an outfit based on / inspired by a favorite pair of your shoes! I love that idea. I am going to keep that in my back pocket if I am feeling short of inspiration sometime in the future (the mental whiteboard is chock full at the moment though, I love that feeling of overflowing with ideas). Anyway, I had decided to sew this dress in November when I picked up fleece for a dress for everyone. For my adult version I used Collette's Laurel pattern. I have used it once before and liked the result. This was a very different experience since my fabric choice was so different (the first time I used a heavy linen). I added on seam pockets, an oversized turtle neck / cowl type collar, lengthened the sleeves and added some leather patches on the elbows and shoulders.
I spent a lot of time thinking about the leather patches. I was really excited to sew with leather, had my special needles in hand, couldn't wait to see how the new machine would handle it. But I didn't want to overdo it. I was originally thinking elbow and shoulders, but it seems like a lot. A lot of sweaters you see with shoulder patches just do one (to reinforce it where you will be laying your rifle I do believe), so I decided to go with one. Then I couldn't stop with a plain square patch, so I angled the corners and cut some diamond shapes out of it. Then I had some cute little diamond cut outs, so I sewed them onto the opposite shoulder in a negative image of the other. Then I made the elbow patches diamond shaped as well. I think it jazzes it up a bit, and I know that sewing with leather was exhilerating! It was so easy! Sally (I think that is going to be her name) the babylock went through it like butter!

Fern took the following pictures for me; I think they came out pleasantly blurred. 


 I also like how those pictures show the shape of the dress. The back darts are a key feature to making an otherwise very boxy dress seem a bit feminine. I originally made this dress longer; I think I just maxed out the fabric when I chose a length. It was very cozy but the static generated when I wore anything underneath it was intolerable. Even with a satin slip in between. I was concerned about this, but hemming about three inches off the bottom solved my issue. I know I will always want to have something underneath, so going to short wasn't an issue (if it's warm enough to wear without pants, it's probably too warm to wear it at all). I was surprised to see that hemming made such a drastic difference. I used the same fancy zig zag stitch to hem as I did on the pants. Love that stitch! Now that it is hemmed, I think I've decided that I like it. I have been wavering a lot, although I will admit that with the temperatures the way have been this winter, I have sure reached for it a lot and layered it on. I can also confirm that I receive extra requests for cuddles when I wear this. We are all getting some miles out of our fleece dresses!