Friday, June 17, 2016

Quick Upcycle

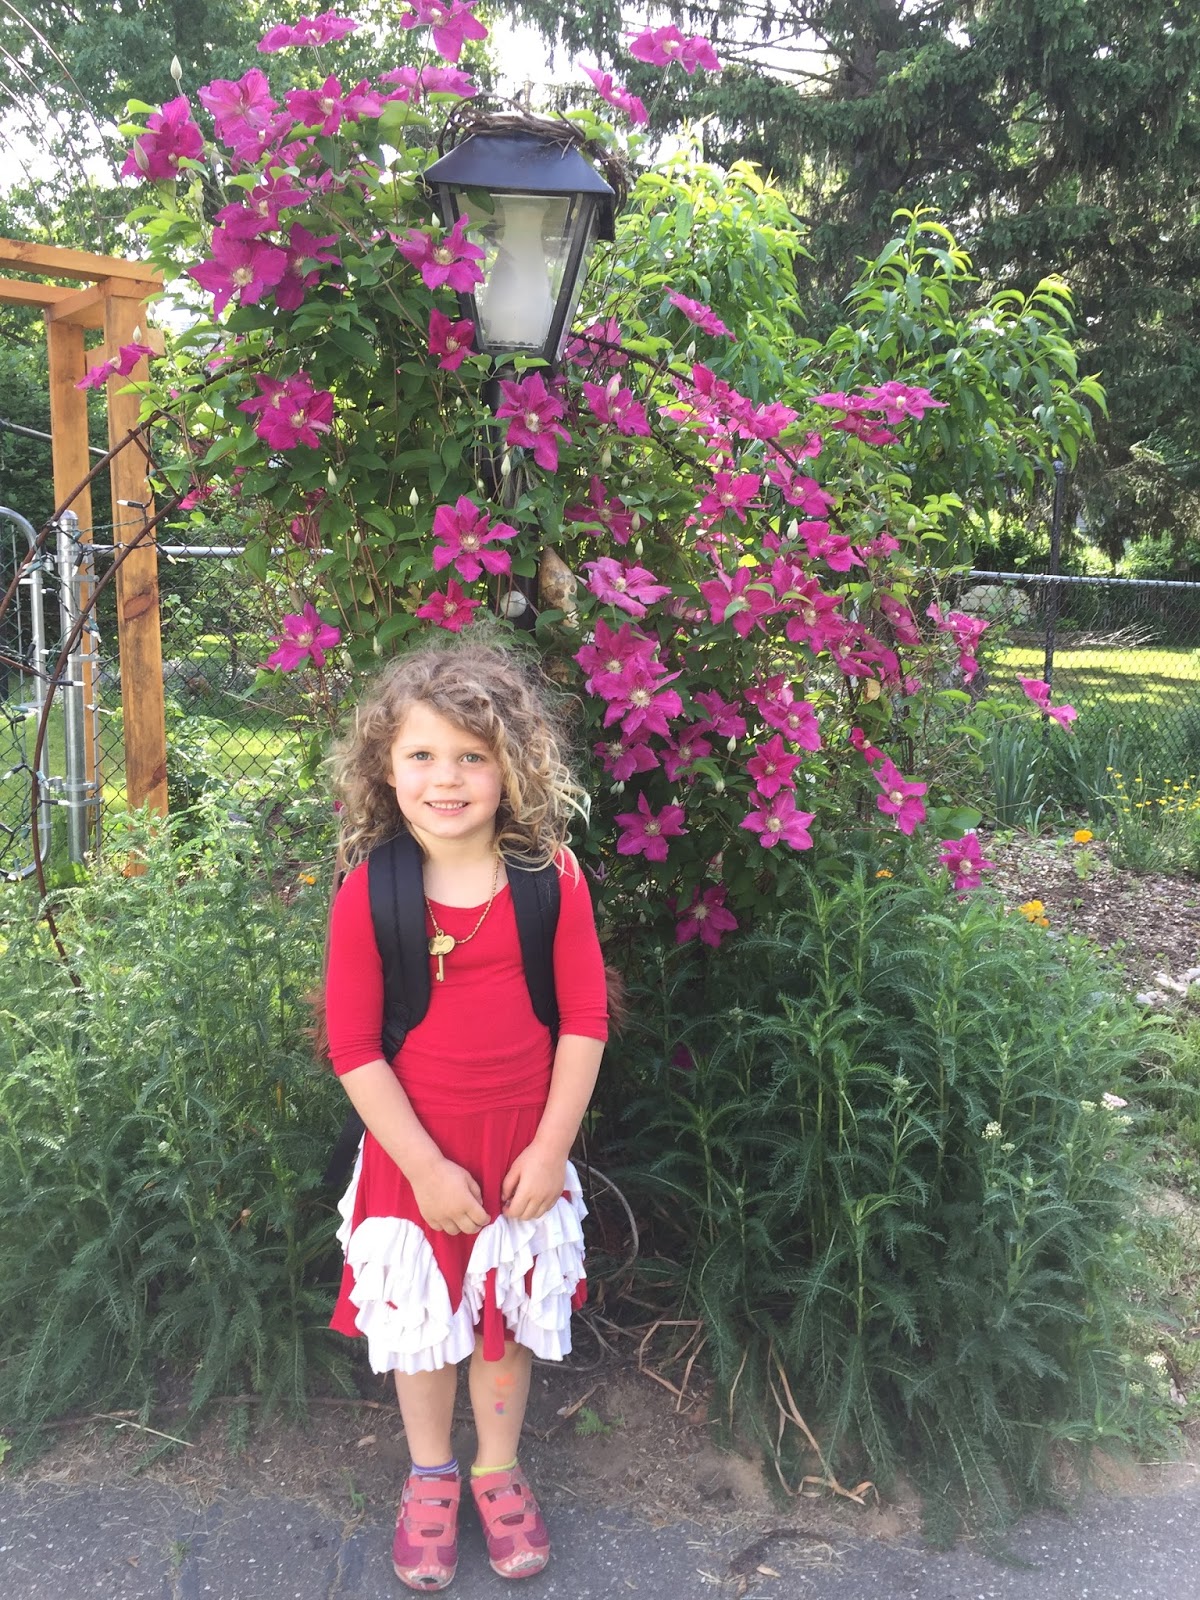
      Althea had her last day of preschool back at the beginning of the month. So it has been the two of us again as we wait for her big sister to finish up being a kindergartner.
Althea on her last day of preschool for the year

       Before school ended, she was supposed to bring in a white t-shirt to decorate. I kept forgetting about it, and all of a sudden one morning I realized that it was due that day. I thought I had one somewhere, but couldn't find it immediately and so decided it would be faster to make one than to keep searching.
      I took an adult long sleeve white shirt that had a logo near the top, and used the bottom of the shirt to make one for her. I traced a t-shirt that fit her and cut out a front and back (utilizing the existing hem of course) dolman style shirt so that I wouldn't have to sew sleeves. I stitched those two pieces together.  Then I cut the neck band off the original shirt, sewed it slightly smaller than the neckhole of her shirt and serged it on. Finally, I cut the wide cuffs from the bottom of the sleeves of the adult shirt and serged them on to the sleeves of this shirt and voila! The cuffs were the perfect width for her upper arm. The whole thing took about 20 minutes and I think the result is super cute! Comfy and slightly original t-shirt for her to cover with froggies!


Thanks for stopping by!


Sunday, June 5, 2016

     Last month, I shared a post on another blog for the first time! Crafting Con is a super fun site where folks let their inner geek shine through the creation of themed clothing for their kids that is NOT a costume, but a wearable garment that can ideally be played in, abused and adored by the recipient. For my debut on their site, I sewed for.. what else? Star Wars month! Here's my post brought back home:

      Our family and our girls are as Star Wars obsessed as the rest of the American youth (and public at large) at the moment, so I am very excited to be here on Star Wars month! Watching the movies with my kids has given me a whole new appreciation of the series. They are very into all of the characters and the plot line and play Star Wars all the time. It was so exciting to see the Force Awakens with them this winter and experience it for the first time all together.
     My youngest daughter, Althea, is an animal person (I mean that literally per her mind - she has a feline and canine persona that are both named, and that she converts to upon request of her sister, or at random. Also, she told me the other day that she is a magical creature and when she grows up her children will be various types of animals). Her favorite Star Wars characters are Chewbacca and the Ewoks. She does a great Chewie impersonation and has been speaking Ewok since watching Return of the Jedi last fall. "Boota, boota!" she calls as she runs through the house. So there was no contemplation necessary in realizing that I was going to make her an Ewok hoodie for this challenge.
My little critter
    I used a pattern from my trusty Ottobre 06/2013 which they called Frozen Meadow. It is a pattern for a raglan style, hooded, faux-fur coat, so I didn't alter anything except for adding ears. The outer coat fabric is this super soft, almost silky plush fur type fabric from JoAnns. It says it is machine washable, so that is a plus. I used a knit that I had which is a thick cotton for the cuffs, hem, trim along the zipper, hood edge casing and hood drawstring. The coat is fully lined, which makes it look very nice on the inside as well. The lining is a combination of old flannel baby blankets: a brown on white print with a touch of green that reminds me a bit of the Star Wars rebel symbol for the body and a green with green stars for the sleeves. I lined the hood with the same plush fabric that the outside is made from, so that she can get really cozy in there. The ears are stuffed with fleece scraps to make them stand up nicely and are hand sewed on to the hood.
Here she is showing off the lining of her Ewok hoodie

      So this makes a very nice and snuggly little layer for her to wear in spring and fall and on cool summer evenings, whenever she is feeling a little wild (aka always) - it serves well as a bear as well as an Ewok.....or dog......or wookie......or whatever mood she is in.
Snugged up in that fur-lined drawstring hood

     To make it more of an Ewok hoodie, I added a leather hood that she can wear over it. I love the way the Ewoks wear some minimalist clothing items that enhance their personality. Her hood is made from the last remnants of this truly amazing pair of rawhide bell bottoms that my mom had from the late 60's. So this hood is pieced together carefully and is held in place by the ear holes. There is also a chin strap that closes with an old leather button. This leather hood can come off so the fur coat can be worn on its own.
Boota!

     My older daughter is more in touch with her feminine side and wears dresses and skirts as often as she can get away with. She really identifies with the strong female characters in these movies and loves Rey and Leia and Padme. I had thought it would be fun to do some fabric dyeing and create Leia's forest look from Return of the Jedi, but Fern had ideas of her own. She was insistent that she wanted a BB8 inspired dress and went right to work drawing it for me. I love when they have a hand in the design process but this was the first time she actually created a physical image for me to work from, so I knew I had to roll with it (pun intended- ha).
Fern's drawing
Fern modeling
     I enjoy the challenge of turning a drawing into a physical item and discovering how a two dimensional shape translates into a sewing technique or a pattern style. Especially when the drawing was done by a 6 year old. According to her, the most important part of her image is the large white circle on the belly of the dress. I decided we would accomplish this with the use of a reverse applique. I found this great white and orange fabric (it's an upholstery fabric that is very smooth on the back side and doesn't seem capable of wrinkling) at a little store in my town that sells repurposed craft materials. All the tutorials I saw on reverse applique left the inside edge of the main fabric unfinished, but that didn't work for me with this project. I turned the edge in and sewed the inside of the circle first, then proceeded to attach the white circle (whose edge was serged) with a decorative stitch.
     Fern's image is clearly a dolman style dress with a mock turtleneck. I didn't find an orange of the right color in a knit fabric, so we went with this satiny material with minimal stretch from JoAnns. Not finding a pattern anywhere for a dolman utilizing a non-stretch fabric, I designed this myself tracing a shirt of hers. It wasn't quite big enough in the arms though (the shirt I was tracing was a knit of course), so I ended up adding a wide strip of the white fabric on each side of the bodice under the arm. I really like the way this worked out. I tucked it into a reverse box pleat and sewed it down for about three inches along the side of the bodice and then let it open up to create more room in the sleeve. I also included a zipper on the back of the dress so that she can get in and out. The bottom is a circle skirt, which always makes her smile when she twirls, and reflects back on the round shape of BB8. I played with the differential on my serger a little bit to give the sides of the mock turtle neck a touch of ruching.
Clockwise from top left: Underarm detail; neck ruching; zipper detail; reverse applique close up

       Her picture had wide sleeves tapering to thin sleeves very abruptly. I asked if we could change it to a short sleeve, but she really wanted the length. So we compromised with a set of armbands that she can wear with it. I like this compromise because the dress is better suited for the upcoming summer weather as a short sleeve dress. And she likes it because she can wear the armbands with this dress or with the Rey-inspired dress I made her a few months ago. The armbands have elastic at the top to keep them in place.
Posing with some cactus because she considers BB8 to be a desert droid; 
wearing her hat sideways so the flower is in the center like the "eye" in her drawing

      The final piece of her drawing is the helmet that she visualized wearing to represent BB8's head. I let her know that helmets are kind of beyond the scope of "inspired" clothing, but she really wanted something. My husband suggested a bonnet which I have been known to sew in the past, and she liked that idea. As I thought about it, I began to think that this helmet was not a bonnet, but a cloche hat. I scoured the internet for the proper pattern to use and ended up with the Penny hat from Elsewhen Millinery on Etsy. I was really happy with the pattern and love the way the hat turned out! The two fabrics that I used for the dress worked great for the hat, lining and hatband. I used a grosgrain ribbon that I had for trim on the outside, and the final detail was a black flower because Fern was insistent that the black "eye" from her picture be included. I made a zipper flower because a) I've been very inspired by all the zipper flowers I've seen on Pinterest for a while now and hadn't tried one yet b) I had a black zipper that I saved off a plastic bedding bag and a green zipper scrap that I had saved, and c) the mechanical aesthetic of the zippers appealed to me since we are drawing our inspiration from a droid. She loves it. It is fun to bask in the adoration of a child that isn't familiar with Pinterest and thinks I'm the most creative person in the world!
 Zipper flower up close

     It is also fun to see them have so much fun in clothes that I made them (and that they participated in creating!). We went to Smith College to run around in their amazing gardens and greenhouse for these pictures. I hope you enjoyed them as much as I have!

      Thanks for having me and may the force be with you!
Friday, June 3, 2016

Firefly baby quilt

For a while now, I have been ensuring that the clothes I sew are finished garments throughout; that the seams are enclosed on the inside as well - no loose strings! I want them to look as professional as I can get them, and to be high quality and durable enough to last for many washings. 
I have recently finished my fourth quilt (two full size, two baby quilts) and am happy to say that with this one, I have achieved the quilting equivalent of this: 
I am as proud of the way the back of the quilt looks as I am of the front!
It was the free motion that did the trick. It virtually eliminated all bunching, and allowed me to create some really exciting quilting designs that are so fun to see illustrated on the back of the quilt. 
So, here she is.
I am going to start by gushing about Michael Miller's Wee Wander fabric once again.
This is the project I finally bought this fabric for, after drooling over it for a couple years.
I made sure to get extra and used some for Fern's Easter skirt as well. I love this print so much. It defines childhood innocence and wonder to me. Not to mention reminding me of countless memories of prancing around as a child myself, then with my younger cousins,
catching fireflies in jars or just marvelling at these brilliant creatures. 

I made two of these quilts, identical in fabric selection, one for each of the friends I was talking about last time. Both of the border fabrics are part of same fabric collection. The back is yellow minky, because I wanted to add a different, super soft texture to the blanket for the babes to explore and snuggle in. And the binding is made from the green sheet that I used for Althea's Jakku dress

Since the print is so engaging, I decided to emphasize my favorite parts of it with the quilting. I started with the grass, tracing the tops of the blades and then adding some additional texture. 

This shows up well on the back also:
  
Then I began tracing the flight of the fireflies. This was when I finally switched into free motion mode and it was the best possible first project for that technique! Being erratic as I spastically became accustomed to the freedom created by covering the feed dogs fit perfectly into the look I was trying to achieve. Some of the fireflies come out of the grass, some from the top of the sky and some from the sides. My girls loved the maze that it created and kept asking if they could trace the fireflies trails. Hopefully the little ones these blankets are for will be just as mesmerized by that aspect of it as they grow and begin noticing greater details of the world around them.

For the square around the center, I just stitched in the ditch around the inner and outer edge (free motion is not ideal for this I realized). But then I couldn't help getting fancy again for the outer edge of the quilt and began tracing the trunks of the trees. I thought I would just do a few of the them, but ended up doing just about every one. It was too addicting. 

It also looks pretty rad on the back. 

I had so much fun with this. I have realized that baby quilts are something I could sew every day. If I had a craft fair booth, this might be what I would fill it with. I don't have a specialized quilting machine, never mind a long arm, so quilting the larger quilts gets so complicated and frustrating. But these little guys fit in my machine with no problem. And I can get super detail oriented without spending too long on one project. Plus, there are so many awesome panel fabrics out there, which make sewing a showstopper of a baby quilt even speedier. 
There will be more of these in my future!

Thanks for stopping by!


Wednesday, May 25, 2016

Baby gifts galore- part 1

I love it when my friends have babies. 
It's so sweet and exciting. 
I loved having babies, so I love to see folks close to me going through that same exhilarating and magical experience. 
And.....I get to sew things for babies. 

I have two close friends that are becoming mothers for the first time this spring. And, shame on me, I took zero pictures of the things I made for one of them. But I did very similar things for both, so I will share what I have. 
Both ladies are going to be using cloth diapers. Which is awesome. Seeing as how most folks don't go there, however, most of the rtw baby clothes out there do not fit over those adorable hugely padded little bums. 
So that is where home made clothes and Rae's Big Butt Baby Pants pattern comes into play. 
This is the first time I used it, and it is a great pattern. Everything lines up so well and comes together so nicely. I am starting to use patterns for almost everything I sew, because it is SO worth it. I used to scoff at the idea of spending $ on a pattern instead of tracing clothes they have or winging it, but I am changing my tune. Especially if I am spending $ on fabric, which I do a little more often now. I still love to upcycle, but I just can't help myself with the adorable prints out there sometimes; especially with special gifts. 
And if it is a great pattern, it ends up getting used so much that the price per use becomes almost negligible. And even if it is only used a few times, the cost often balances out the time it saves, and prevents wasting precious fabric.  So using patterns is one of my big resolutions for this year, and I am doing well with it. Of course, modification and pattern hacking are always available!
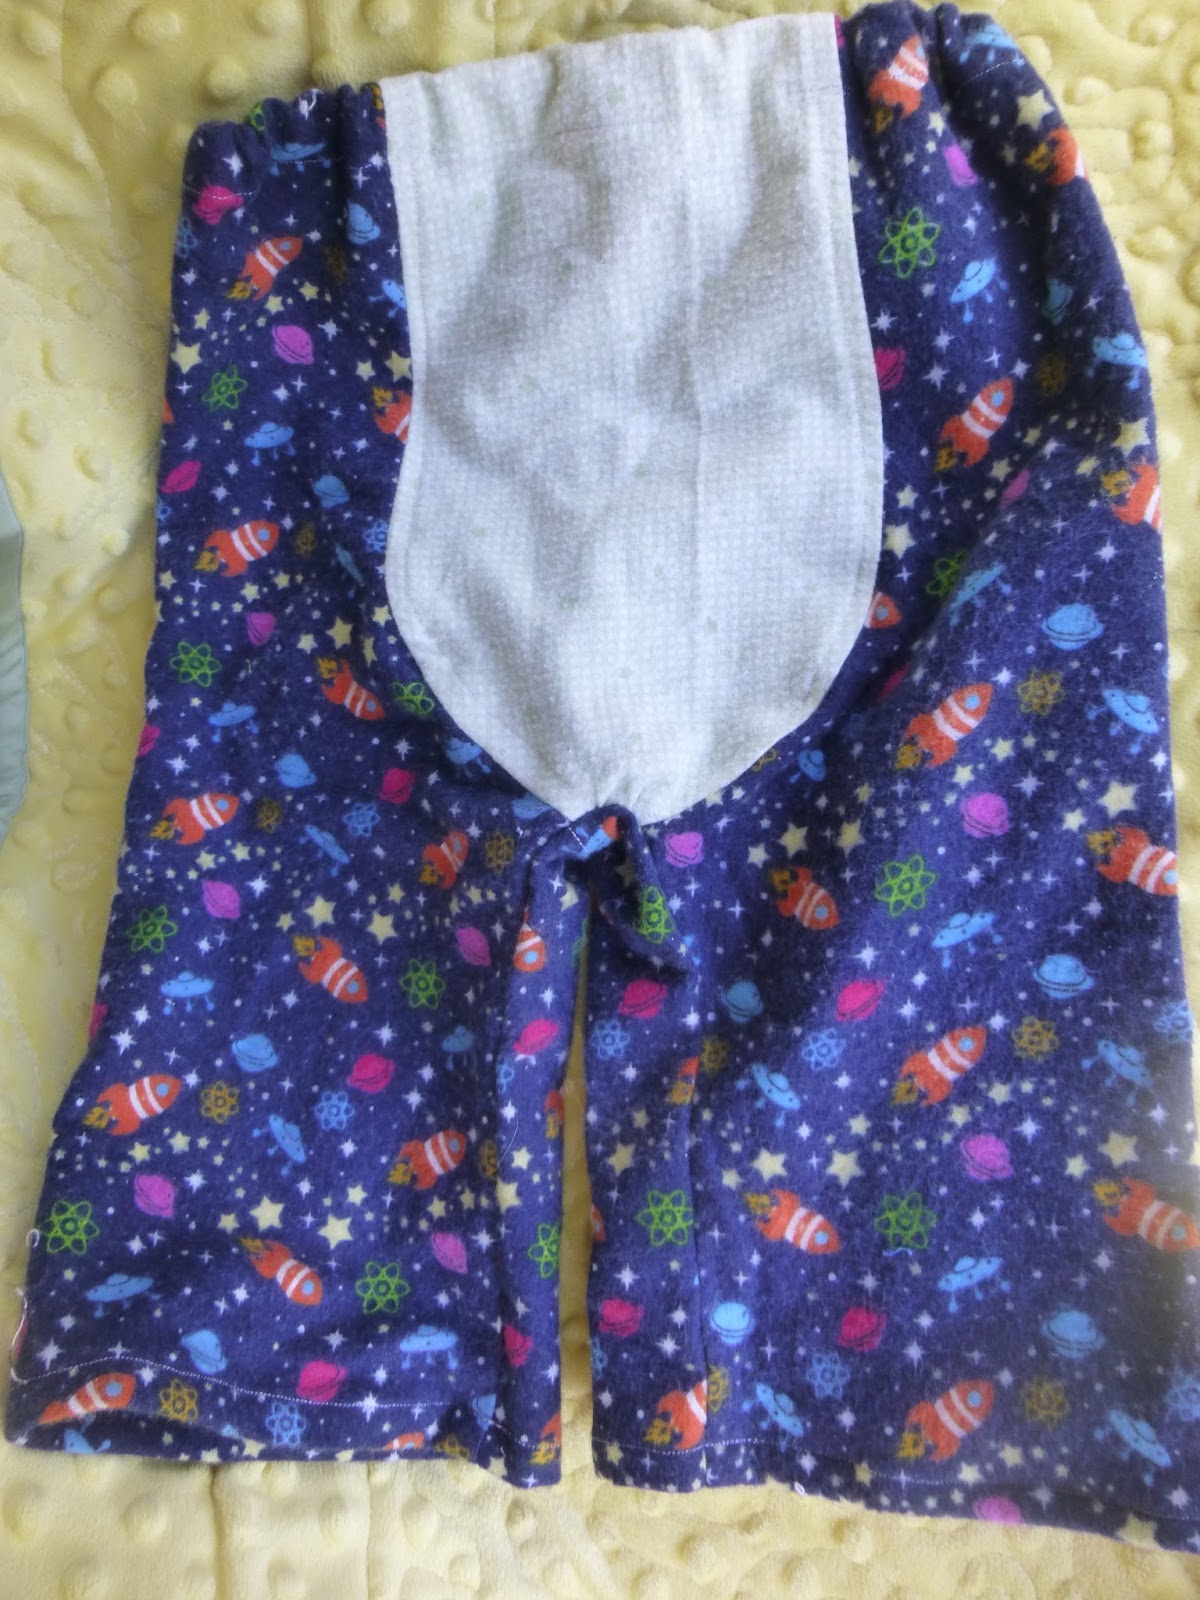
I have made 5 pair of the big butt pants. 
Here are 3 of them:
 They are not actually lopsided as this picture seems to depict; but I took pics right before popping them in the mail, so no chance for redos. 
 I added elastic to the leg openings on this pair. 
This 3-6 m pair was a spontaneous use of the scraps I had leftover from my other 4 pairs. One of the beautiful things about baby clothes- it doesn't take much yardage! I love the mix of fabrics here too.

They are all flannel. I bought the spaceships and dogs at JoAnn's and the stars are both old baby blankets.  Baby clothes really make me smile. I also loved hearing my girls asking "mom are those more big butt baby pants?" They loved the name of the pattern as much as I did. 
Rae also has examples of / tutorials for adding ruffles across the butt piece for little girl pants. 
Keep having babies please, my friends!


Monday, May 16, 2016

Now I'm (in) Free.....Free Motion

        Wow! The earth shifted under my feet yesterday. I was like Dorothy stepping into Oz and my surroundings went from black and white to color. It was like the moment at a wedding when your favorite song comes on, your impossibly high heels come off and you can finally REALLY bust a move.
        I covered those feed dogs up with a darning plate, and just like that......free motion quilting!
Darning plate
        What took me so long to do this?! I guess I thought that I needed to screw the darning plate on, and that I would have to go locate some tiny little screws and a doll sized screwdriver. But not even - this magnificent little piece of plastic has little pegs attached to it that sit perfectly into the holes provided and it aligns itself in seconds. And stays put when I sew!

Here is my machine with and without the darning plate. The most time consuming part was threading my bobbin thread through the hole before I installed the plate. 

I also changed my presser foot, but I believe the darning plate made most of the difference. I bought a kit of extra feet a few months ago, and it came with a darning foot. This installation did require the removal and replacement of a screw, but a normal screwdriver sufficed.
 Here's a side view of the darning foot, installed. 
This is what I took off to put the darning foot on; my "low shank adapter" fitted with a zig zag foot

        I have a Babylock BL9. It's a great machine. It always amazes me how many things are possible with a basic sewing machine. I got this one when my old Singer died. I brought it to be fixed, but they let me know there was nothing to be done (fixing it would have cost more than replacing it) and so this one came home with me. I wasn't planning on buying a new machine that day; hadn't been saving for it at all, so I brought home the most basic machine they had that still had at least a zigzag stitch. It did come with some extra feet, this darning plate, and some stretch stitches that my other machine didn't offer, so it ended up being an upgrade while remaining closer to $100 than $200. The instruction books never really give you the full idea of what is possible though, so I love this internet community that helps me discover all the possibilities available to me in my sewing.
Embroidex kit of extra presser feet; it includes fifteen pieces and came with this case and a sheet identifying all the feet with a brief description of what each was for. 

       I bought that kit of feet when I was sewing the rainbow/ school quilt. Several of the feet included I had already (button foot; buttonhole foot; zig zag; zipper). I was looking for a walking foot at the time though, because I thought it would solve all my quilting problems. I was having issues with having the top and bottom layers end up in slightly different places and ending up with some bunching. The walking foot's job is to pull the top layer of fabric along the way the feed dogs pull the bottom layer along, so that everything stays even. Unfortunately, I began the quilting of that project by sewing around the outside of the quilt, and I think that created problems beyond the scope of changing my presser foot.
        I used the walking foot for another small quilting project, and honestly, I don't really notice a difference between using that and my normal presser foot. Perhaps it is not a high enough quality foot? I do feel confident I installed it properly. Anyways, using the darning plate (which covers the feed dogs so that the movement of the fabric is controlled completely by me, and can go in any direction without twisting the entire quilt around) and the darning foot (which lifts up when the needle is up so that it doesn't hinder the movement of the fabric between stitches) completely solves my problems. Also, I have learned to start in the center of the quilt, and to radiate out from there, trying not to leave big gaps to come fill in later. Perhaps this is the biggest factor in reducing the bunching on the back of my quilts.
        The darning plate also allows so many more possibilities in terms of design. Being able to turn at the drop of a dime, in any direction, is truly exciting. A whole new world my friends, and I didn't need to purchase a whole new (expensive) machine to get there.
     
        When I was in college, there were some guys that lived next door to my good friends, and they had a little band. A house party type of band, pretty casual; I don't remember the band's name or the names of any of the guys in the band (maybe one was Warren?), but I do remember the chorus from a song they had. The lines are called out in a monotone but last part of the second line is repeated in a deep baritone (written in italics here); it's all accompanied by a steady, funky guitar: "As I lay me down to sleep, I pray the lord my mind to free!/ Free your mind, your ass will follow/ your ass will fol-low"
         I need to have some sort of soundtrack playing externally or internally the whole time my machine is whirring, and this song seems to be it for the past couple days. I'm not sure I've landed on the winning combo of words to fit my situation yet, but I think it may be: "Free your feed, your lines will follow!"
       I applied this song to my skiing as well, when I finally found a pair of reasonably priced tele boots and could free my heel. Free your heel, your knee will follow! Or maybe ass works just as well here. The words change pretty often, but the head bobbing stays about the same.

Thanks for stopping by!

Thursday, May 5, 2016

Quilting for Fun and Fundraising

      This February, a fellow parent from my daughter's school asked me if I had any ideas of things the kids could make to sell for silent auction at an annual fundraising event being held in early April. Seeing as sewing is so often on my brain, I suggested making a quilt that the kids help create. She loved the idea (especially since I volunteered to sew it!) and so I spent a good chunk of the month of March madly cutting and sewing and quilting. It was a hit and they ended up using it as the only item up for live auction that night. 
      It was a lot of work but good fun too. The school names the classrooms each a different color of the rainbow, and they recently voted their school mascot to be a cow. So the design of the quilt presented itself to me pretty easily. I cut out squares of muslin and gave the kids some fabric markers with free rein to decorate the squares however they liked. I provided some stencils and some ideas in case they needed some inspiration, but barely anyone paid any attention to that - they were so full of their own ideas. Then I arranged the squares in groups based on class, two rows for each class. The white squares were bordered by solid colored fabric in the color of their class. There was also a strip of the solid colored fabric above and below the rows. Then the classes were all sewn together in rainbow order. The Purples didn't participate (their students are older and they don't have as much free time in class) so I used purple to make a border so they would still be represented. Finally, I used a black spots on white cow print fabric for the backing, and made quilt binding out of the cow as well. I used the same tutorial for the binding as I did on my first quilt, because it is so clear and easy to follow with great results. 
    The top row of blue squares and the two rows of indigos are not in this picture, but this is the best shot I was able to get of it. It is a double sized quilt; about 80x88". And believe it or not, I did iron all parts of this several times. The light in this picture is really highlighting all the wrinkles created during my quilting battle. 
     I kept the quilting super simple, because I do not have a long arm machine, and this is the second quilt I have ever made! It is mostly stitch in the ditch, with a row of zig zags on the solid stripe in the middle of each class section. I learned my lesson about starting my quilting in the middle of the quilt instead of zipping a line around the border of the quilt first thing. Yikes, not sure what I was thinking. I was able to smooth things out pretty well though, and really the focus of this quilt is the kids art not my sewing. 
      I brought the quilt in to show all of the kids during a school wide talent show that was held the week before the fundraising event (the fundraiser was adult only, so I wanted to give the kids a chance to see it). It was so great to hear all of their voices exclaiming when I unrolled it and held it up! They were so excited to see their work compiled into a big functional object. "Wow!" "I see mine!" "Beautiful!" That was definitely my favorite moment. Fern came up to the front of the room to help me hold it up and display it for everyone to see. She was very proud as well, which was very sweet. She usually says she never wants to be in the talent show, and is scared to get up in front of the whole school (understandably! that type of stuff used to terrify me as well!), but she said that she was looking forward to going up there with me all day. Aw. 
      Getting the quilt squares back was like Christmas. I loved seeing what each child came up with. It was great to see themes emerge from each class (the green have a lot of bird watchers, the reds love basketball, lots of pacman fans in the oranges, etc.) and to see the differences between the age groups (ranging from K-5). Here are some of my favorites. 
Note the sloth in the red section!
 
   There were so many awesome images. My only regret is that I didn't take more pictures. I was too concerned with trying to keep the dog hair off everything. No small task when you are dealing with this much fabric!
   I had so many ideas for this that didn't end up making it into the quilt for the sake of time and simplicity. Perhaps there will be more in the years to come....

Thanks for stopping by!

Thursday, March 31, 2016

Hullo Spring!

   I just love sewing for Easter. I always had a special Easter dress growing up, or a fun hat or something. And even though we are not a religious family and just have a pretty casual family gathering on the big day with an egg hunt for the kiddos, I still love having something fresh and new and fun for the kids (and sometimes myself) to wear. I guess it has to do with Easter being a sort of gateway to spring and all the new possibilities that opens up in terms of style; or maybe it is just fun to have at least one reason to dress up in every season and this is the big one for spring. The older I get, the more spring becomes my favorite season. (I may change my tune once fall rolls around again). I love to garden and walking around the yard, seeing what is popping up is as thrilling to me as shopping for fabric. Maybe even more so (gasp!). So it is fun to celebrate this wonderful time of year with sweet things for the girls.

Hellebores, one of the first bloomers in my yard this year.

    I have a large project which I am procrastinating on  finishing up right now that had been keeping me from garment sewing this past month. But I decided that I would be able to squeeze some Easter bonnets in there no matter what. And then on Saturday night, I figured that I could make Fern a new skirt to match her bonnet, because skirts are so quick, and I didn't really know what else she would wear to go with the color scheme of her hat. And then Althea asked if I could make her a new Easter dress, and I had to tell her yes, but it might not be done for Easter since it was Saturday afternoon when she was asking. (I had a dress in her closet in mind that matched her bonnet). But I picked out some fabrics and thought about it and knew exactly what I wanted to make for her. So I went to sleep after finishing Fern's skirt and both bonnets and woke up motivated and confident and decided that I could pull off her dress before we had to leave to head to Grammy's house.
     The Alley Cat pattern had been such a fun sew last month. It fit the girls so well and is so cute and comfortable and stylish. I am starting to get the hang of using knits, and using my serger which makes everything so much faster and easier. As a result, I was able to bang out an alley cat dress on Easter morning. I went from uncut fabric to finished garment in two hours, and took a break to scarf down the breakfast my husband made in the middle of that. And another break to braid Fern's hair. This is an all time record for me. I cut the sleeve and skirt hems on the selvage of the fabric, which helped. And I sewed the entire dress on my serger except for the top stitching on the neck. I think using sleeves helps make this an easier sew as well. I still have yet to do one of those burrito rolls. But the dress came out great, and she was enchanted.
The skirt fabric was from that Knit Fix I bought from Girl Charlee last August. Slowly and surely, I have been ploughing through that soft pile of fun. We agreed the bubbles remind us of eggs and made it especially appropriate for Easter. The top fabric is this stretchy, almost rubbery eyelet material that I got from JoAnn's a year or two ago as an add on purchase. I am so bad about grabbing an extra yard or two (or just a half in the case) of something that catches my eye while waiting in line at the cutting counter. But they usually end up as some of my favorite fabrics. This worked out perfect for this project, and I have enough left of this and the skirt that I think Fern is going to get a legit alleycat out of it. They love to be twins sometimes. 
       
     Fern loves her skirt as well. It has some of that amazing glitter elastic as a waist band and utilizes some of my all time favorite fabric: the wee wanderer by Sarah Jane for Michael Miller. I bought some recently for another project and made sure I had some extra for garments for the girls. This print almost makes me want to cry, it is so sweet.
Fern's face in this kills me. We didn't do a very good job getting pictures; either the sun was in their eyes or the bonnets shaded their faces completely. 

Here is a close up of that print: 
Love it. 

     And they are both happy about their bonnets. Which makes me so so happy. I love that neither of the girls feel too old for them at all yet. I had to expand my pattern to a new size; I now have a 0-12 month (which is probably more like 6-12 month and I will probably make a 0-6 if any of my friends or family have a baby girl), 2-4 year and 4-6 year size. I may put up a tutorial / pattern if there is any interest. A fun thing about them is that they are completely reversible, so you get two adorable sunhats in one. I usually do a print and a solid, but on Fern's I used two different coordinating prints. They are so fun and satisfying to sew and always get so much use over the spring / summer / fall at our house. Just don't let your husband fold them in half, crease the interfacing in the brim and stuff it in his back pocket if you end up making one. Ahem.

Fern is wearing her Easter coat from two years ago. Love that it still fits her! The sleeves are slightly short, but not that bad, and otherwise it is fine. Skinny little girl. It is her go to outerwear throughout spring and fall. 

     Happy Spring time!!!