Sunday, July 31, 2016

Knitpop Love

      I have become addicted to two sewing-related companies this summer. In such a good way. I finally got some pictures of things I have made with their fabric and patterns respectively, so I am going to rave about each of them in the next few posts. I'll start with Knitpop, the fabric selling company of Sarah Jaggers Knook based out of San Diego. She has a website, which sells tons of great stuff, but she also conducts about 3 x weekly online fabric auctions on facebook which are SO ADDICTING!!! If you want all the details on how these work, you can join the facebook group, read the pinned post and start stalking auctions; it becomes self explanatory pretty quickly. Basically, they cut a 1-2 yards of several somewhat coordinating piles of soft gorgeousness, post a picture and people start bidding on it.  Oftentimes you can score great deals (my last auction box was full of 12 yards of beautiful, high quality stuff for less than $5 / yard including shipping) and almost always you will see some unique things that she doesn't have the quantity of to post in her shop.
      Aside from buying fabric and having it show up on my doorstep 2 days later (everything always ships same day on 2 day express in flat rate boxes or envelopes) I have been loving learning about different types of fabric from this site and facebook group. They carry such a large variety of knits and have descriptions available along with seeing people post what they make with each thing. The best learning experience for me however, was when I bought a Knitpop scrap pack (which was AWESOME! I know not everyone gets quite as beautiful of a box as I did, but man it sure got me hooked- a big pile of 8 gorgeous fabrics for $25 + $12 shipping)
See what I mean?
Plus - huge bonus for me - just in case this picture isn't letting you know, most of this is on the orange side of pink. 
I don't think I could have designed a more perfect scrap box if she gave me free reign of her warehouse.

         Once it came and after I finished petting it and rubbing it all against my cheek and opening it up to get the full effect and gauge sizes, I got to work trying to to decide what everything was. I had seen the tie dye on the left being sold in an auction box listed as rayon spandex. The 2 cream colored ones were obviously sweater knits. I'm not totally sure if this automatically qualifies them as hacci or if a fabric has to have a specific tightness of weave to be hacci, but sweater knit is good enough for me. (One is ribbed, one heathered). The floral next to the tie dye is very lightweight, perhaps rayon spandex as well, perhaps jersey. The stripe is about the same weight as the rayon spandex although maybe a bit lighter and is also SO soft. It may be a brushed poly? Hmmm. I do feel confident on the rest of my analysis though: floral next to the strip is liverpool, next one down to the right is scuba and the floral on black is a ponte de roma. All three of the last ones were things I had heard of but not actually seen and touched and sewn.
        As much as I had read about these fabrics before and heard others say what they do or don't recommend them for, nothing beats having them in your hand to truly understand what the fabric is about. The scuba for instance (which gets its name from being a distant cousin to neoprene wet suit material) was screaming peplum at me. Unfortunately, I didn't have quite enough for that, so it became a regular tank top instead, with some of that ribbed sweater knit as a side panel to fill in where I was running short.
Yup, it's a cell phone mirror selfie. 
And the shirt is not top stitched as of yet. We will have to revisit this in the future. 

           The tie dye wanted to be cropped palazzos, because I really felt like I needed those in my summer wardrobe. I was unsure at first if I would have enough to make the pants and the waistband out of the same fabric, but not only did I have enough, I had enough to match stripes, make a large foldover yoga style waistband and still have scraps large enough to be project worthy on something for the kids.

The stripes I believe will end up as nighties for the girls, along with a shirt for me. They already saw some life as the trunks of the skirt (paired with the black floral ponte) in my last post.   I have a pretty adventurous pair of pants brewing in my mind that uses the black floral ponte. The liverpool is also a great bottom weight; I see knickers for back to school. I have yet to sew with it, but love the feel of it so much that I bought another liverpool print for some shorts for me and overalls for Fern during a July 4 flash sale that I found posted on Knitpop's website while I waited in the worst Cape traffic in the history of my life (because a little technology in the wrong hands can do a lot of harm.....getting off 495 to beat the traffic is a TERRIBLE idea, trust me).
During that sale, I also picked up some french terry that Fern has fallen completely in love with (me too!), a fun mustard jersey with doves printed on it and a (generous) yard of this purple dahlia on blue poly cotton spandex that I had seen in some auctions and then on the site and had been haunting my dreams. I probably should have ordered more, but I thought it was going to be a 4-way stretch fabric and perfect for leggings. It actually is more of a 2-way stretch, so instead I made a tunic (which would have been a dress if I had gotten a little bit more). Regardless, I love it.
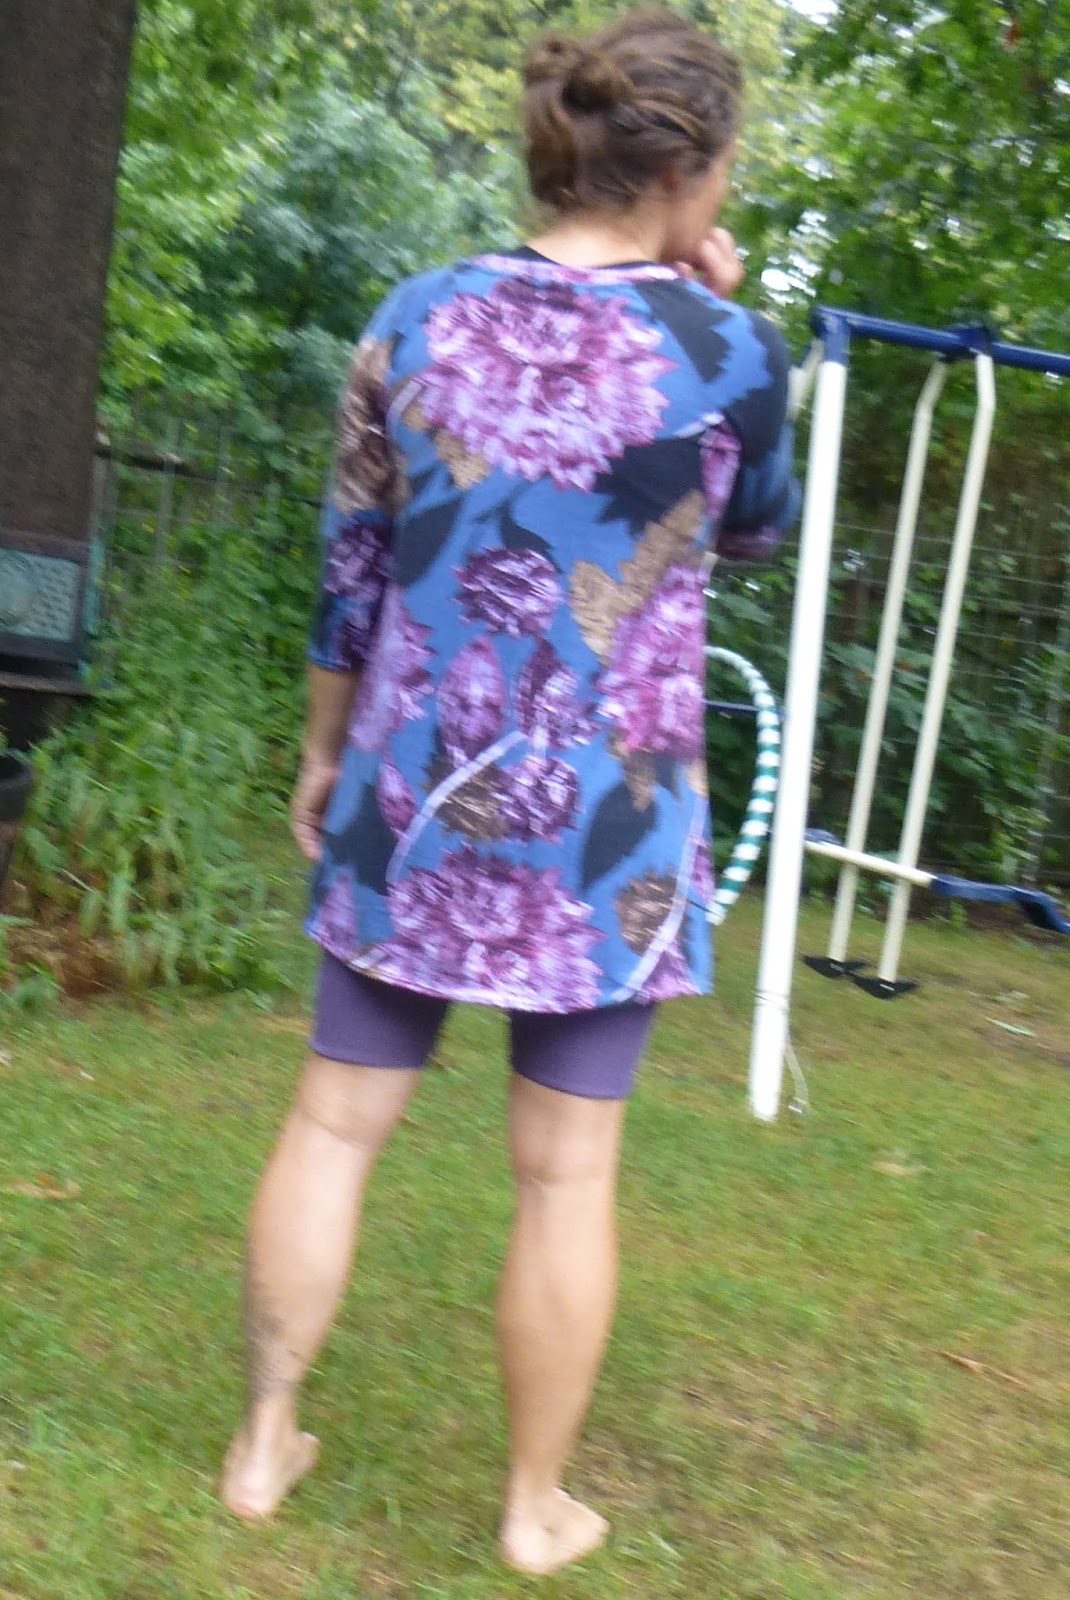
 Photo credit is going to Fern on a lot of these. Man, pictures of myself are tricky. 


I cannot get over how much I love this print and how soft and comfortable it is. 

          The first auction box that I bought from Knitpop was on a day when Sarah's husband Sander was running the auction for a bit. (I kind of feel like I know these people - which I am going to allow myself to not feel creepy about. Our family business has turned customers into friends on more than one occasion). He was adding funny lines of commentary to each box....blurred transmission; eighties' mixed tape, hippy in a box. The one that spoke to me was dirty hippy. Ha! I will admit I've been called that name before. Plus the fabrics were great (cotton lycra tie dye and cotton spandex paisley). Plus I was planning to attend a Phish show a few weeks after this box posted for the first time in a few years. How could I pass it up? 
These are my two dirty hippy fabrics, although this picture was taken after I had cut into them. 

          Here's what I have so far:

Aaaaaaaaand.......that hoodie is reversible: 
 I think the girls may see a maxi or two from the tie dye. And I am hoping for a sports bra out of the paisley. Figuring out ways to use up all of this lovely knit fabric is such a fun challenge to be facing. 
 I actually have another auction box as well, in which I see a romper for myself, leggings for everyone, and multiple solid coordinates to help fill in the gaps. Once I have caught up a bit, there will have to be another post for that box!
Until then, thanks for stopping by!

Wednesday, July 20, 2016

"Skirting the Issue" with Simple Simon and Project Run and Play

        Here we are in the midst of the summer! What a great time of year. There are so many fun things I want to talk about, but first I want to share a meaningful project that is hosted by the lovely ladies at Simple Simon and Company (who also happen to be the main gals behind Project Run and Play; the sewing-for-kids equivalent of Project Runway that inspired me to blog about sewing) every year during the month of July.
       "Skirting the Issue" is a touching event they have begun, in which sewists from all around, connected by the internet, sew lovely and unique skirts to be donated to kids in the foster care system. It's a great way to help kids who have had a rough start in life feel special. You can read more about the event, and how to participate, here.

        So in honor of skirting the issue, I am going to talk about sewing a skirt with attached shorts. In my house, the general rule is that shorts are worn underneath skirts and dresses unless they are maxi length (and sometimes even then) because I have yet to see the girls wear one without flashing what is underneath at least a dozen times. Honestly, I have started wearing shorts under my own skirts that come above the knee as well! Chasing kids, bending over, wind blowing.... who knows what might happen and with some shorties or bloomers underneath it doesn't bother me.
         Having trunks attached makes it even easier to follow this rule, and you know that they will always coordinate. This can be accomplished very easily when making a skirt that has a waistband of some sort, i.e. an exposed elastic waist or a foldover yoga waistband. Basically, you sew your skirt, sew your trunks, baste together and add the waistband.
         To help illustrate, I sewed a skirt-with-trunks from some lovely, soft, knit fabric (both fabrics from a KnitPop Scrap Pack) and added an elastic waist. First, I decided what pattern to use for the shorts. This was an easy decision for me, because Baste & Gather has a FREE (hurray!) pattern for "summer shorties" by Selvage Designs.  This is a great pattern for sizes 12M-8 that creates snug shorts made from knit fabric; perfect for this application! Also, it uses a waistband to finish the top of the shorts, so you don't have to make any alterations to get a perfect fit. (If the shorts pattern you choose creates a waistband by folding down the top of the shorts, then you would need to cut the fabric about an inch and a half lower on top to get a good fit sewing it the way I am about to present).
      Using this pattern, I cut out two legs as mirror images of eachother,
then laid them right sides together and sewed the front and back crotch seams.

           I used a serger for this, but you could also use a zigzag stitch or stretch stitch on a regular sewing machine. Just make sure to use a stitch that will stretch for you.
          The next step is to line up the crotch seams on top of eachother, and sew the leg inseam. Now you have created shorts, and can hem them at this time as well.
           Knit fabric doesn't fray the way woven fabric does, so hemming is optional. I sometimes like to leave knits unhemmed, because no seam that I add will ever be as soft and stretchy as the fabric itself. Hemming does look more finished however, and also helps finish the bottom of my serged inseam, so I decided to hem these shorts. Again, make sure to use a stitch that will stretch when you do this! I folded my fabric about 1/2 inch up the inside of the leg (I only folded once instead of twice, because as I mentioned earlier, the knit won't fray) and zigzagged over it to hem my shorts.
           The next step is to create the skirt. I decided to make a simple, slightly gathered A-line skirt and made my own pattern piece for this.
This is my skirt pattern piece; the straight side on the left will be placed on the fold of the skirt fabric when cutting. I cut two of these skirt pieces. 

      I calculated the skirt pattern dimensions as follows: my shorts were ~9 inches tall at their highest point, so I decided to make the skirt 10 inches long.
       I wanted the waist to be slightly wider than the waist band would be. I was basing it off my daughter's measurements and she has a 21.5" waist. Since my pattern piece would be cut on the fold, and two pieces would be cut, the waist of the skirt would be almost 4 x the waistline of the pattern piece (actually just under 4 because of the seam allowances on the side seams). I made the top horizonatal line, aka the waist, 6.5" long. This will yield a finished waist of 26" minus about 1" for 1/4" seam allowance on the each side of both skirt pieces; so a 25" waist. Great. There really is a lot of freedom when calculating this measurement. I felt that this was a good size that would be large enough to be easy to slip on over the hips and bum, and not have so much fabric that it created a bulky waist seam at the end. I did curve the waist-line up slightly at the outer edge for a more circular waistline.
        I wanted the skirt to flare out in an A-line shape, so I drew a diagonal line from the edge of my waist out to about double that at 12" and free hand curved the bottom line up about an inch and a half. So my skirt should have a bit of freedom and twirl to it. You could also do a full or half circle skirt if you wanted an even twirlier version.
        I will take a moment to talk about skirt fabric right now. I had been thinking of using a soft, slinky knit whose content I am not totally sure of, but must be rayon spandex or cotton jersey or something. It was so soft and it was beautiful. But it occurred to me that without another fabric lining it, it was most likely going to be clinging to those trunks all day long. So instead I used this one, which again I am not 100% on content, but I believe to be a ponte de roma. Moral of the story: something a little more heavy and with a smoother finish will end up working better for the skirt here, so that it doesn't cling to the trunks. If you have a light, soft, probably grabby fabric that you are dying to use though, making the legs of your trunks super short will be a good idea. You could also insert a lining fabric in this skirt / short sandwich if you are so inclined.
       I cut two of these skirt pieces on the fold. You do not have to worry about mirror images here because the pieces are symmetrical, but do pay attention to if your print is directional or not (meaning is there a top / bottom to the print).
                I then laid the skirt pieces right sides together and sewed both sides of the skirt.
     
               Once the skirt was constructed, I sewed a gathering stitch along the top.  Also known as a basting stitch, this is a straight stitch set to the longest length between stitches that your machine offers; for me that is at 4. Leave long thread tails at the beginning and end of the stitch. Then, holding the bobbin thread, you can gather the skirt along the thread, distributing the gathers roughly evenly around the skirt.
            Next, I inserted the shorts into the skirt (right side facing out on both, or right side of shorts to wrong side of skirt), lined up the side seams of the skirt with the sides of the shorts, and pinned them together at the sides, front and back. This is a good time to adjust the gathers as needed to ensure the width of the skirt and shorts lines up well. You can pin more if you prefer.

                I then basted the skirt and shorts together with a narrow zigzag stitch, to make it easier to sew them both to the waistband without losing part of one or the other in the process. I made sure that my zig zag was lower than my gathering stitch, and then removed the gathering stitch with my seam ripper. I didn't want that straight stitch to interfere with the stretch of the skirt waist.
                Next, I created the waistband. I am a little bit obsessed with all the glitter elastic I have seen at JoAnn's recently. I had some of this silver on black elastic that I had used to make myself a belt earlier this summer. It seemed to be the perfect thing for this skirt once I decided to used the floral on black fabric for the skirt. I cut a piece about 21"; slightly smaller than my daughter's 21.5" waist, so that it will be snug enough to stay up well but not overly tight. I sewed the ends of the elastic together, right sides facing, then folded the ends out towards the side and topstitched them down to create less bulk.
                 The final step was to sew the waistband onto the skirt. I placed it along the top of the skirt/ shorts with right sides facing, and sewed it on. I could have used a zigzag stitch on my regular sewing machine but I decided to live on the edge (terrible pun intended) and serge it, keeping a super close eye on not letting the elastic go under the blade. If you cut this type of elastic along the long edge, it begins to unravel.  I did have to stretch the elastic a bit as I went, since the skirt / shorts were wider than the band. I made it all the way around without any casualties, and ended up with a lovely skirt!
               
Note that I did not hem the skirt itself. The drape is so nice without it, I didn't feel it needed it. I just had to carefully tie off those side seams. 

         A beautiful skirt, a playful skirt, a modest, cartwheel friendly child-sized skirt. Fern was more than happy to be my model. 


Over at Project Run and Play, they are sharing skirt inspiration all month long! Go check them out!

And thanks for stopping by!


Tuesday, July 19, 2016

Quilting for Love

          I have found a new way to keep my machine whirring. Along with clothes, I have now sewn 5 quilts in the past two years. Each one has certainly been a labor of love. This last one especially. A labor of love, to honor the love between two people that I love, and whose love I stem from.
        My parents celebrated their 40th wedding anniversary at the end of June, and I had been pondering how best to honor them for a long time. I considered trying to plan a surprise party, but surprising my mom with an event would be pretty near impossible to accomplish. This woman plans vacations and celebrations about a year and a half ahead of time. She is more organized than I can really even fathom and there was no way I could compete with that. So I decided to stick to what I am good at, and began brainstorming quilt patterns instead of invitation lists.
        A universal theme with our family is the beach, so I was thinking about shells and sealife, but nothing was feeling right. We have always spent a lot of family time together at the cape, and they recently bought a house there, so I started to focus on that. Something for the cape house.  We tend to be there for July 4, or perhaps the next weekend, so things are usually quite patriotic. Also, my parents were almost married on the bicentennial of the nation's birthday (but my grandmother made them switch it to the weekend before). So I settled on stars and stripes and red, white and blue. I found a flag print with hearts and stars on the red tag shelf at JoAnn's (and had a 50% off red tag coupon!) and snatched that up for the backing.
        I decided to have this be the only overtly flag printed fabric, and for the rest of my fabric choices, I used a lot of blue flowers (I couldn't find hydrangeas, but a lot of beautiful things that reminded me of them), some white with blue, some red, some that looked like fireworks and pieced them all together into a large star shape in the center, with several smaller stars and some stripes around the outside. I made some quilt binding out of some plain red fabric. 
Final product. Love it so much, especially that center star. So proud!

         This was the first time I did a pieced quilt like this and I loved it. I scoured pinterest for quilt stars, and used this one as my center star inspiration: 
                                        which you can read more about here
                  I at first tried to use the pythagorean theorem to figure out the length of the sides on all the triangles I drew, scaled up, but there were too many unknowns and too many triangles that didn't easily fit into a right triangle. So I made a life sized version of one quadrant; went all origami on it then cut it up. Then, I traced each piece onto some cardboard with 1/4" seam allowance added, and cut those out for my pattern pieces. It was quite a lot of work before even cutting any fabric, but I guess that is what quilting is all about. It's ridiculously time consuming every step of the way. Which some may not understand, but when you are thinking about how awesome it is going to turn out, and how much the receiver will appreciate it (especially if it is your parents; no one loves your work more than them, right?) and you are a bit of a math / art geek then it is actually a very pleasant way to spend your time. 
              Here's some close ups of the other stars


 And that center star again, because I love it:

And here is some fun quilting I did on a plainer navy fabric (free motion of course; I have decided it is the only way to go with quilting):

And some detail of some of the free motion quilting on one section of pretty blue floral:

        You can kind of see how I just did some zigzagging on the lighter blue floral next to this one; I hated it. I almost ripped it out, but I didn't have that kind of time on my hands. Tracing the print on the fabric and emphasizing the beautiful fabric is my favorite way to quilt right now. This was the first large (non-baby) quilt that I have done in free motion and it was infinitely easier to do than to quilt a large blanket without the free motion. It is however, still a little bit ridiculous and tricky considering I don't have a long arm machine. I am going to try to stick to baby blankets for the most part. And not even because I don't like doing it, but it just takes so. much. time. My want to sew pile of clothing projects grew so large while I worked on this that I probably won't finish it before I start on Halloween costumes. But I guess when you love to sew, the list always grows faster than your machine can go. Toying with ideas is half the fun. 
        Anyways, they loved it. It is queen sized, but I figured they would use it as a throw on the couch or something. They wanted to hang it up on the wall, which I was against, because I think they should be used. When I asked where she would have the space to hang a queen sized quilt, she brightened. Realizing it was a queen, she brought it inside and laid it out on her bed. And kept it there. 
Melts my heart. Almost as much as this:
Happy Summer!
Happy belated fourth of July!
Thanks for stopping by.

Thursday, July 7, 2016

Rash Guards

The swim fabric fun continues! 


        I actually have a confession to make before I talk about these shirts. I went on vacation with my family from the end of June through the beginning of July....and I brought two sewing machines with me. That's normal, right? We were there from the beginning of one weekend through the end of the next, and during the weekday stretch in the middle my husband and father came home and went to work and I stayed with my mom and kids. I knew during that stretch things would be quieter and I would have some free time.....so I thought I would bring my sewing machine and a project to work on. But when I thought about the things I wanted to make, I felt like I needed to have my serger as well. So I went for it. It was a very productive week - the first night we got there, I finished the dress I was making for myself for a fancy dinner my mom was planning (which allowed me to stop sewing and start packing much earlier in the day than I would have otherwise while we were trying to get on the road). I made myself 3 other items which I will share later on, and I made rashguards for the girls to sport on the beach! I also mended my brother's beach blanket. It may have set a dangerous precedent. 
      So back to the swim shirts. This is more of the fabric from my big Spandex House purchase this spring. I used that favorite Ottobre magazine once again and cut and sewed these up completely while the kids were sleeping at night. It is wonderful to trust how they size for these patterns, and to be able to just cut and sew without measuring them. When I finished, I thought they looked a little bit big, but when they put them on the fit was perfect. 

I cut the sleeves and bodice of this one out completely on the selvage which worked great; they both had that white edge to them. So her sleeves are a little longer. 
The sleeves and bodice of this one are hemmed with a double needle. That is one reason her sleeves are shorter. Also: This was just about the last bit of that rose fabric and also her arms are longer. The 3/4 length works well for this though.

      I made two of the same size and let them pick which shirt they liked in the morning. I love the way the fabrics coordinate with their bathing suits colorwise without matching completely. And I love how we are a well matched threesome on the beach!
See the book in the corner? Can you tell what it is?? We finally read the Rats of NIMH! I had been wanting to read that book with them forever but we have been working on a few long series' that are hard to step away from. 
We finished one of our Narnia books while on vacation, and didn't bring the next one. Then I found this at a bookstore we stopped at.....serendipity. 

Thanks for stopping by!